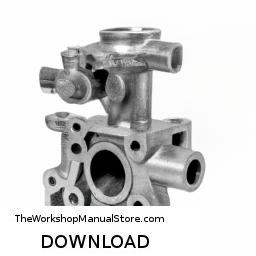
Performing a gearbox oil change on a Kohler single-cylinder engine (K91, K141, K161, K181, K241, K301, K321, K341) involves several steps. For full details, download the manual by clicking here…..
- 5 Things You Should Do To Your Kohler K Series Engine Right Now | Kohler K Series Engine Maintena… kohlerengines #smallenginerepair #isavetractors In this video I go through 5 things you should do to your Kohler K Series Engine …
- Kohler K-series Ignition Timing w/a Timing Light: K91, K141, K161, K181, K241, K301, K321, K341 I knew my Kohler engine wasn’t running right and suspected the ignition timing was off. In this video I show how I adjusted the …
Here’s a detailed guide with the necessary tools and descriptions:
– **Safety Equipment**
– **Safety Goggles**: protects your eyes from any debris or oil splashes.
– **Gloves**: Keeps your hands clean and protects against oil and chemicals.
– **Tools Required**
– **Socket Set/Wrenches**: For removing the oil drain plug and any other fasteners. A 3/8” drive socket set is commonly used.
– **Oil Filter Wrench (if applicable)**: If your engine has an oil filter, this tool helps in removing it easily.
– **Oil Catch Pan**: To collect the old oil during the draining process and prevent spills.
– **Funnel**: Helps in pouring new oil into the gearbox without spills.
– **Rags or Shop Towels**: For cleaning any spills and wiping down tools and surfaces.
– **Torque Wrench**: To ensure that bolts are tightened to the manufacturer’s specifications when reassembling.
– **Magnet Tool**: Useful for retrieving any dropped screws or small parts.
– **New Oil**
– **Gearbox Oil**: Use the manufacturer-recommended oil for the specific engine model. Typically, this may be a 30-weight non-detergent oil for older Kohler engines, but always verify with the manual.
– **Preparation Steps**
– **Park on a Level Surface**: Ensure the engine is on a flat surface for accurate oil level readings.
– **Let the Engine Cool**: If the engine was recently running, allow it to cool to avoid burns.
– **Remove the spark Plug**: This prevents any accidental starts during the oil change.
– **Draining the Old Oil**
– **Locate the Oil Drain Plug**: Find the oil drain plug, usually located at the bottom of the gearbox.
– **Position the Oil Catch Pan**: place the catch pan under the drain plug to collect the old oil.
– **Remove the Drain Plug**: Use the appropriate socket or wrench to unscrew the drain plug. Allow the old oil to fully drain out into the pan.
– **Inspect the Drain Plug**: Check for any metal shavings or debris that could indicate wear and tear on internal components. Clean the plug if necessary.
– **Replacing the Oil Filter (if applicable)**
– **Locate the Oil Filter**: If your model has an oil filter, identify its location.
– **Remove the Oil Filter**: Use an oil filter wrench to unscrew the old filter. Be prepared for some oil spillage.
– **Prepare the New Filter**: Apply a thin layer of new oil to the rubber gasket of the new filter to ensure a proper seal.
– **Install the New Filter**: Screw the new filter onto the engine until snug. Avoid over-tightening.
– **Filling with New Oil**
– **Reinstall the Drain Plug**: After draining, replace and tighten the drain plug securely.
– **Locate the Fill Cap**: Find the oil fill cap on the engine.
– **Use a Funnel**: Insert a funnel into the fill hole to avoid spills.
– **Add New Oil**: Pour in the recommended amount of new gearbox oil, usually specified in the engine’s service manual.
– **Check Oil Level**: After filling, use the dipstick (if available) to check the oil level. Add more oil if necessary to reach the recommended level.
– **Final Steps**
– **Replace the Fill Cap**: Secure the oil fill cap back in place.
– **Reconnect the spark Plug**: Reattach the spark plug wire.
– **Start the Engine**: Run the engine for a few minutes to circulate the new oil.
– **Check for Leaks**: After running, inspect the area around the drain plug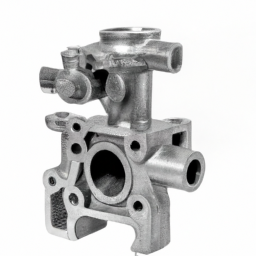 and filter for any signs of leaking oil.
– **Dispose of Old Oil Properly**: Take the used oil to a recycling center or auto shop that accepts used oil.
– **Record Keeping**
– **Log the Oil Change**: Document the date of the oil change and the type of oil used for future reference.
By following these steps, you can successfully change the gearbox oil in your Kohler single-cylinder engine, ensuring its longevity and optimal performance.
An intercooler is a vital component in turbocharged and supercharged engines, designed primarily to enhance the performance and efficiency of the engine by reducing the temperature of the compressed air before it enters the combustion chamber. When air is compressed by a turbocharger or supercharger, its temperature rises significantly, which can lead to reduced air density and potential engine knock. The intercooler addresses this issue by cooling the compressed air, allowing for a greater volume of denser air to be introduced into the engine.
There are two main types of intercoolers: air-to-air and air-to-water. Air-to-air intercoolers use ambient air to cool the compressed air as it passes through a series of fins and tubes. This type is common in many performance vehicles due to its simplicity and effectiveness. Air-to-water intercoolers, on the other hand, utilize water to absorb heat from the compressed air, making them more efficient in certain applications, particularly in high-performance or racing environments where space and weight are critical considerations.
By lowering the intake air temperature, intercoolers help to increase engine power, improve fuel efficiency, and reduce the risk of engine knock. This results in better overall engine performance, longevity, and reliability. In summary, the intercooler is an essential component in forced induction systems, playing a crucial role in optimizing engine performance and enhancing the driving experience.