
Replacing the transmission pan gasket on a Jeep Commander (XK) can seem daunting, but with some basic tools and patience, you can do it yourself. find more details on the download manual…..
- 3 INCH JEEP COMMANDER XK LIFT FOR 33's PART 1 – REAR Got 33’s on Gator the Pimp Edition Jeep Commander!! Here’s how I did it starting with the rear! #Jeep #commander #lift Wheels …
- Jeep commander Jeep commander in snow.
Here’s a step-by-step guide that simplifies the process:
### Tools and Materials Needed:
– **Socket set** (typically 10mm and 13mm sockets)
– **Wrench set**
– **Torque wrench**
– **Flathead screwdriver or trim removal tool**
– **New transmission pan gasket**
– **Transmission fluid** (make sure it’s the correct type for your Jeep)
– **Oil catch pan**
– **Shop towels or rags**
– **Safety glasses and gloves**
### Steps to Replace the Transmission Pan Gasket:
1. **Preparation**:
– **Safety first**: Wear your safety glasses and gloves.
– **Park the vehicle**: Ensure your Jeep is on a flat surface and the engine is turned off. Engage the parking brake.
– **Lift the vehicle**: Use a jack to lift the front of the Jeep and secure it with jack stands. Make sure it’s stable before going underneath.
2. **Locate the Transmission Pan**:
– **Find the transmission pan**: It’s a large metal pan located underneath the vehicle, towards the back of the engine.
3. **Drain the Transmission Fluid**:
– **Place the oil catch pan**: position it under the transmission pan to catch the fluid.
– **Remove the drain plug**: If your pan has a drain plug, use the appropriate socket to remove it. If not, you can skip this step, but be prepared for fluid to spill when you remove the pan.
4. **Remove the Transmission Pan**:
– **Unscrew the bolts**: Using the socket set, carefully remove the bolts securing the transmission pan. Keep track of where each bolt goes.
– **Gently pry off the pan**: If it’s stuck due to old gasket material, use a flathead screwdriver to gently pry it loose. Be careful not to damage the pan or the transmission.
5. **Clean the Surfaces**:
– **Remove old gasket material**: Use a scraper or a clean rag to remove any remnants of the old gasket from the pan and the transmission surface. Ensure both surfaces are clean to prevent leaks.
– **Inspect the pan**: Check for any damage or excessive wear. If the pan is cracked, it may need to be replaced.
6. **Install the New Gasket**:
– **Position the new gasket**: Place the new gasket onto the transmission pan. Make sure it’s aligned correctly.
– **Apply sealant (if required)**: Some gaskets may require a light bead of RTV sealant. Check the instructions that come with your gasket.
7. **Reattach the Transmission Pan**:
– **Align the pan**: Carefully lift the pan back into position and align it with the bolt holes.
– **Insert the bolts**: Hand-tighten the bolts to hold the pan in place, then use a torque wrench to tighten them to the manufacturer’s specifications. Tighten them in a criss-cross pattern to ensure even pressure.
8. **Refill Transmission Fluid**:
– **Replace the drain plug**: If you removed it, put the drain plug back on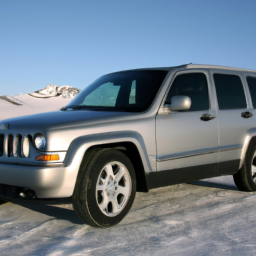 and tighten it.
– **Add new fluid**: Use a funnel to add transmission fluid through the dipstick tube. Consult your owner’s manual for the correct fluid type and capacity.
9. **Check for Leaks**:
– **Start the engine**: Let it run for a few minutes and check for any leaks around the pan.
– **Check fluid level**: With the engine running, check the fluid level using the dipstick and add more fluid if necessary.
10. **Final Steps**:
– **Lower the vehicle**: Carefully remove the jack stands and lower the Jeep back to the ground.
– **Clean up**: Dispose of any used fluid properly and clean your work area.
### Conclusion:
Congratulations! You’ve successfully replaced the transmission pan gasket on your Jeep Commander. Make sure to monitor the area over the next few days for any signs of leaking. If you have any doubts during the process, don’t hesitate to consult a professional for help.
A ball joint is a crucial component in a vehicle’s suspension system, playing a vital role in facilitating smooth vehicle movement and maintaining proper wheel alignment. Essentially, it is a spherical bearing that connects the control arms to the steering knuckles, allowing for a range of motion while supporting the weight of the vehicle. This component is designed to enable the up-and-down movement of the suspension, as well as the steering motion when the driver turns the steering wheel.
Ball joints consist of a metal ball encased in a socket, which is typically made of durable materials such as steel and rubber. The design allows for a pivot point that accommodates the flexibility and articulation needed during normal driving conditions. There are two main types of ball joints: upper and lower, depending on their position in the suspension system. Each type has its own specific function, but both are essential for maintaining the vehicle’s handling and stability.
Over time, ball joints can wear out due to constant movement, friction, and exposure to road conditions. Signs of a failing ball joint include uneven tire wear, a clunking noise when turning, or a loose steering feel. Regular inspection and maintenance are necessary to ensure that ball joints remain in good condition, as failure can lead to serious handling issues and compromise overall vehicle safety.