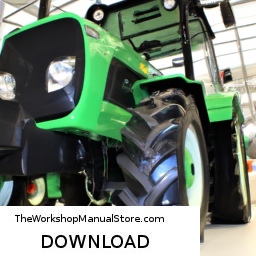
Replacing the transmission filter on a Deutz FL 411 involves several steps and requires specific tools and parts. View and download the manual with one click here……
- Deutz f2l511d Motor Dieselmotor
- Everything You Need to Know About a Deutz Air-Cooled Diesel Deutz Allis in the shop for a valve set, let’s go over it while it’s here. Subscribe: http://bit.ly/SubDeboss | Merch: …
Below is a detailed guide on how to perform this task, including the necessary components and safety precautions.
### tools and Materials Needed
1. **New Transmission Filter**: Make sure to get the correct filter that fits the Deutz FL 411 model.
2. **Transmission Fluid**: Check the specifications for the correct type and amount of fluid required for refilling.
3. **Wrenches/Sockets**: Common sizes include 10mm, 13mm, and 17mm, but check your specific model.
4. **Screwdrivers**: Flathead and Phillips screwdrivers.
5. **Oil Catch Pan**: To collect the old transmission fluid.
6. **Rags or Towels**: For cleanup.
7. **Safety Goggles and Gloves**: For personal protection.
8. **Funnel**: For pouring new fluid into the transmission.
9. **Torque Wrench**: For ensuring bolts are tightened to manufacturer specifications.
### Step-by-Step Procedure
#### 1. Preparation
– **Safety First**: Ensure the vehicle is on a flat surface and the engine is off. Engage the parking brake and use wheel chocks to prevent movement.
– **Gather tools and Materials**: Have all tools, new filter, and transmission fluid ready.
#### 2. Locate the Transmission
– The transmission on the Deutz FL 411 is typically found beneath the vehicle. You may need to raise the vehicle using a hydraulic jack and secure it on jack stands for better access.
#### 3. Drain the Old Transmission Fluid
– **Locate the Drain Plug**: This is usually located at the bottom of the transmission pan.
– **Remove the Drain Plug**: Carefully remove the drain plug using the appropriate socket or wrench. Allow the old transmission fluid to drain completely into the oil catch pan.
– **Replace the Drain Plug**: Once drained, replace the drain plug and tighten it securely.
#### 4. Remove the Transmission Pan
– **Locate the Transmission Pan Bolts**: These will be holding the pan in place.
– **Remove the Bolts**: Using the appropriate socket, start removing the bolts. Keep track of them as you will need to reinstall them later.
– **Carefully Remove the Pan**: Once the bolts are removed, gently pry off the pan. Be cautious as some fluid may still be present.
#### 5. Replace the Transmission Filter
– **Locate the Old Filter**: The transmission filter is usually mounted within the transmission housing.
– **Remove the Old Filter**: Depending on the design, you may need to twist it off or remove screws holding it in place. Be prepared for any residual fluid to spill out.
– **Install the New Filter**: place the new filter into position, ensuring it is seated correctly. Follow the manufacturer’s instructions for securing it (screw or twist-on type).
#### 6. Clean the Transmission Pan
– **Clean the Gasket Surface**: Use a scraper or rag to remove any old gasket material from the pan and transmission housing. Ensure that the surfaces are clean to prevent leaks.
– **Inspect the Gasket**: If the gasket is damaged or worn, replace it with a new one.
#### 7. Reinstall the Transmission Pan
– **Position the Pan**: Align the pan with the transmission housing.
– **Insert and Tighten the Bolts**: Hand-tighten the bolts first, then use a torque wrench to tighten them to the manufacturer’s specifications. This is crucial to avoid leaks.
#### 8. Fill with New Transmission Fluid
– **Locate the Fill Port**: This is usually located on the side of the transmission.
– **Use a Funnel**: Pour the new transmission fluid into the fill port. Refer to the owner’s manual for the specific amount required.
– **Check Fluid Level**: After filling, start the engine and let it run for a few minutes. Shift through the gears, then check the fluid level using the dipstick (if equipped). Add more fluid if necessary.
#### 9. Final Checks
– **Inspect for Leaks**: Look around the pan and filter for any signs of leaking fluid.
– **Dispose of Old Fluid Properly**: take the old transmission fluid to a recycling center or an appropriate disposal location.
### Conclusion
Replacing the transmission filter on a Deutz FL 411 is a manageable task if you follow these detailed steps and take necessary safety precautions. Regular maintenance can help prolong the life of the transmission and improve performance. Always consult the service manual for specific guidelines and torque specifications related to your model.
An axle is a fundamental component of a vehicle’s drivetrain, serving as a central shaft that connects two wheels, allowing them to rotate in unison. Typically made of steel or other durable materials, axles are critical for supporting the weight of the vehicle and ensuring stable movement. There are two main types of axles: drive axles and non-drive axles. Drive axles are connected to the vehicle’s transmission and are responsible for transferring power from the engine to the wheels, enabling propulsion. Non-drive axles, on the other hand, do not receive power and are primarily used for support and steering.
In addition to their primary function of enabling wheel rotation, axles also play a significant role in maintaining the overall stability and alignment of a vehicle. They help distribute the vehicle’s weight evenly across the wheels, which is crucial for handling, performance, and safety. Axles are equipped with bearings that facilitate smooth rotation and reduce friction, contributing to the vehicle’s efficiency.
Moreover, axles can be classified based on their design and application. For instance, solid axles consist of a single shaft running from one wheel to another, while independent axles allow each wheel to move independently, enhancing ride comfort and handling. Overall, axles are indispensable components that contribute to a vehicle’s functionality, performance, and safety, making them vital in automotive engineering and design.