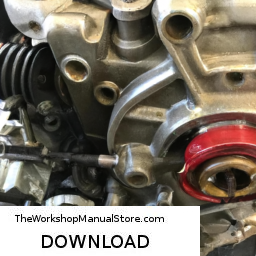
Replacing the gasket on a Honda GX200 horizontal shaft engine involves several steps and requires some knowledge of small engine mechanics. more details on the download manual click here…..
- $150 Honda Clone vs $600 Honda? Let’s settle this! Fuel Efficiency, Horsepower, Durability, Sta… Is the Honda clone just as good as the Honda? Is the Honda better than the Harbor Freight’s Predator and Briggs and Stratton …
- Predator 212 burning tires,gx160, honda gx200 Funny ,burning tires , chopper.
Below, I will provide a detailed guide on how to perform this task, including descriptions of the components involved.
### Tools and Materials Needed:
1. **Tools:**
– Socket set (with extensions)
– Torque wrench
– Screwdrivers (flathead and Phillips)
– Pliers
– Gasket scraper or putty knife
– Clean cloths or shop towels
– Soft hammer
– Engine block cleaner (optional)
– Safety glasses and gloves
2. **Materials:**
– Replacement gasket (specific to the Honda GX200)
– Engine oil (for lubrication)
– RTV silicone (optional, for additional sealing)
### Steps for Engine Gasket Replacement:
#### 1. Preparation:
– **Safety First:** Ensure the engine is off, cool, and disconnected from any power source. Wear safety glasses and gloves.
– **Workspace:** Have a clean, well-lit workspace to perform the replacement.
#### 2. Remove the Engine from Equipment (if necessary):
– If the engine is mounted on equipment (like a pressure washer or generator), disconnect it from the equipment. this may involve removing bolts or screws that hold the engine in place.
#### 3. Drain Oil and Fuel:
– **Drain Oil:** Remove the oil drain plug (usually located at the bottom of the engine) and let the oil drain into a suitable container. Replace the drain plug once drained.
– **Drain Fuel:** If applicable, drain the fuel tank by using a siphon or by running the engine until it runs out of fuel.
#### 4. Remove the Engine Cover:
– Using the socket set, remove the bolts securing the engine cover. Carefully pry off the cover using a flathead screwdriver if it’s stuck.
#### 5. Identify the Gasket to be Replaced:
– Depending on the specific gasket you’re replacing (cylinder head gasket, base gasket, valve cover gasket, etc.), locate the component associated with the gasket.
#### 6. Remove the Component:
– **For Cylinder Head Gasket:**
– Remove the bolts securing the cylinder head. Use a torque wrench to loosen them in a crisscross pattern to avoid warping the head.
– Gently lift the cylinder head off. If it doesn’t come off easily, tap it lightly with a soft hammer.
– **For Base Gasket:**
– Remove the engine from its mount if not already done. Remove the crankcase bolts in a crisscross pattern.
– Carefully lift the crankcase from the engine block.
#### 7. Clean the Surfaces:
– Use a gasket scraper or putty knife to carefully remove the old gasket material from the mating surfaces. Be cautious not to scratch the surfaces.
– Clean the surfaces thoroughly with a cloth and engine block cleaner to ensure a good seal with the new gasket.
#### 8. Install the New Gasket:
– **For Cylinder Head Gasket:**
– Place the new gasket onto the engine block or cylinder head, ensuring it is properly aligned with all holes and passages.
– **For Base Gasket:**
– Similarly, place the new base gasket onto the engine block.
#### 9. Reassemble the Engine:
– **For Cylinder Head:**
– Carefully place the cylinder head back onto the engine. Insert and hand-tighten the bolts in the correct sequence (usually a crisscross pattern).
– Use the torque wrench to tighten the bolts to the manufacturer’s specified torque settings (consult the service manual for specifics).
– **For Crankcase:**
– Reassemble the crankcase by aligning it with the new base gasket.  Hand-tighten the bolts.
– Again, use a torque wrench to tighten to the specified settings.
#### 10. Reattach Components:
– Reattach any components that were removed earlier, including the engine cover, fuel line, and any electrical connections.
– Ensure all bolts are tightened securely.
#### 11. Refuel and Refill Oil:
– Fill the engine with new oil through the dipstick tube. Make sure to use the correct type and quantity as specified in the owner’s manual.
– Refill the fuel tank with fresh fuel.
#### 12. Test the Engine:
– Start the engine and let it run for a few minutes. Check for any leaks around the gasket area.
– Listen for any unusual noises and ensure the engine is running smoothly.
### Conclusion:
Replacing a gasket on a Honda GX200 horizontal shaft engine is a straightforward process if you follow the steps carefully. Always refer to the service manual for specific torque settings and detailed information relevant to your engine model. Proper maintenance, including timely gasket replacements, can prolong the life of your engine significantly.
A tire pressure sensor is a critical component of modern automotive safety and performance systems. Primarily, it serves the essential function of monitoring the air pressure within a vehicle’s tires. These sensors can be part of a Tire Pressure Monitoring System (TPMS), which is either a direct or indirect system.
In a direct TPMS, each tire is equipped with its own sensor that measures the air pressure and transmits this information wirelessly to the vehicle’s onboard computer. this system provides real-time data, enabling drivers to receive immediate alerts if tire pressure drops below the recommended levels. In contrast, an indirect TPMS does not use dedicated sensors; instead, it utilizes the vehicle’s anti-lock braking system (ABS) to monitor the rotational speed of the tires. A significant difference in speed between tires can indicate a loss of pressure in one or more tires.
Maintaining proper tire pressure is crucial for several reasons. Under-inflated tires can lead to decreased fuel efficiency, increased tire wear, and a higher risk of blowouts, while over-inflated tires can result in a harsher ride and reduced traction. Tire pressure sensors enhance safety by helping to prevent these issues, contributing to better handling, improved fuel economy, and overall vehicle performance. Many modern vehicles are equipped with these sensors as standard equipment, reflecting their importance in promoting safe driving practices and enhancing user convenience.