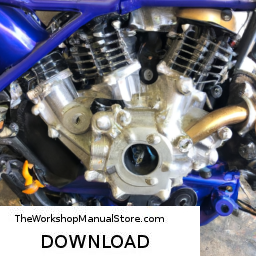
Replacing a catalytic converter on a Kawasaki FH601D engine involves several steps to ensure that the process is safe and effective. Discover more by downloading the manual here……
- Ferris Mower with Kawasaki engine, first start after repairs: Will it run? Here is my attempt at reassembly and starting the Ferris Hydrowalk 32 mower. It has a Kawasaki 13 Hp 401v engine. If you found …
- SUPER EASY KAWASAKI “V-VALVE” ADJUSTMENT Help support my Channel by checking out my extensive parts store here on amazon ?? Check out this page from …
Here’s a reverse order explanation of the replacement procedure:
### 6. **Reassemble Components**
– Reattach any components that were removed or disconnected during the process, such as heat shields, exhaust pipes, or other parts that may have been in the way.
– Ensure that all bolts and fasteners are tightened to the manufacturer’s specifications.
### 5. **Test the Engine**
– Start the engine and let it run for a few minutes to check for any leaks or issues.
– Monitor the exhaust system for unusual noises or smells that could indicate a problem with the new catalytic converter.
### 4. **Install the New Catalytic Converter**
– Position the new catalytic converter in place, ensuring a proper fit with the exhaust system.
– Secure it with the appropriate clamps, bolts, or gaskets, ensuring a tight seal to prevent exhaust leaks.
### 3. **Remove the Old Catalytic Converter**
– Disconnect the exhaust system from the old catalytic converter by loosening the clamps or bolts.
– Carefully remove the old catalytic converter from its position, taking care not to damage surrounding components.
### 2. **Prepare the Work Area**
– Ensure that the vehicle is on a stable surface and use jack stands if required for safety.
– Gather all necessary tools and the new catalytic converter before starting the replacement.
### 1. **Safety Precautions**
– Disconnect the battery to prevent electrical shorts or accidental engine starts.
– Allow the engine and exhaust system to cool down completely before starting the work to avoid burns.
By following these steps in reverse order, you can effectively replace the catalytic converter on a Kawasaki FH601D engine. always refer to the vehicle’s service manual for specific instructions and torque specifications.
A muffler clamp is an essential component of a vehicle’s exhaust system, designed to secure the muffler to the exhaust piping. Its primary function is to maintain a tight and leak-proof connection between the muffler and the exhaust system, ensuring that exhaust gases are directed away from the engine and the passenger cabin effectively. The clamp is typically made of durable materials such as stainless steel or galvanized steel, which provide resistance to corrosion and heat, enhancing its longevity and reliability under extreme conditions.
Muffler clamps come in various designs, including U-bolt clamps, band clamps, and lap joint clamps, each suited for different types of exhaust system configurations. The choice of clamp often depends on the specific design of the exhaust system and the preferences of the vehicle manufacturer or aftermarket installer. Proper installation of a muffler clamp is crucial; it not only prevents exhaust leaks that can lead to noisy operation and decreased engine performance but also helps in maintaining the integrity of the exhaust system as a whole.
Additionally, a faulty or worn-out muffler clamp can lead to vibrations, rattling noises, and increased emissions, which may not only affect the vehicle’s performance but also pose environmental concerns. Regular inspection and replacement of the muffler clamp when necessary are important maintenance practices to ensure optimal exhaust system functionality and vehicle efficiency.