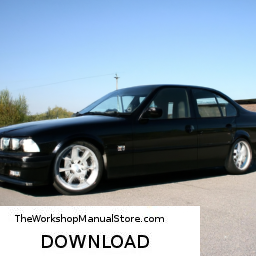
Replacing the shock mounts on a BMW 5 Series E39 involves several steps that require specific tools and a basic understanding of automotive repair. Read more about it and download the manual now……
- Building a BMW E39 in 10 minutes Almost one year journey… Let’s take a look at our project car and how did it changed over one year since we start working at this …
- BMW E39 535i V8 245hp VS BMW F10 528i 245hp (3.5i V8 vs 2.0i L4 Turbo) Acceleration test What is your opinion about this battle ? What care would you pick between them ? Leave you thoughts and recommendations for …
below is a detailed guide on how to perform this replacement.
### Tools and Materials Needed
1. **Tools:**
– Socket set (including sizes 10mm, 13mm, and 18mm)
– Wrench set
– Torque wrench
– Jack and jack stands
– Spring compressors (if replacing shocks)
– Pry bar
– Hammer
– Screwdriver set
– Pliers
– Rubber mallet (optional)
– Clean cloths or rags
2. **Replacement Parts:**
– New shock mounts (front and/or rear as needed)
– New shock absorbers (optional, if replacing shocks)
– New hardware (if needed, check with the parts supplier)
### Step-by-Step Procedure
#### 1. **Preparation**
– **Safety First:** Park the vehicle on a flat surface and engage the parking brake. Wear safety goggles and gloves for protection.
– **Gather Tools and Parts:** Make sure all tools and replacement parts are ready.
#### 2. **Lift the Vehicle**
– **Loosen Lug Nuts:** If you’re replacing the rear shock mounts, loosen the lug nuts on the rear wheels while the car is still on the ground.
– **Jack Up the Vehicle:** Use a hydraulic jack to lift the vehicle and secure it with jack stands. Ensure it is stable before working underneath.
– **Remove Wheels:** If necessary, remove the wheels to access the shock mounts (especially for rear shock mounts).
#### 3. **Accessing the Shock Mounts**
– **Identify the Shock Mounts:** The front shock mounts are located at the top of the strut assembly under the hood, while the rear shock mounts are located in the trunk area, underneath the rear parcel shelf.
#### 4. **Removing the Front Shock Mounts**
1. **Remove the Engine Cover (if needed):** If the engine cover obstructs access, remove it using your socket set.
2. **Disconnect Electrical Connectors:** If there are any connectors attached to the strut assembly, carefully disconnect them using pliers or a screwdriver.
3. **Remove the Strut Nut:** using a socket wrench, remove the center nut on the top of the strut. It may require holding the strut shaft in place with an Allen key or a special tool.
4. **Remove the Strut Assembly:** Loosen the bolts securing the strut to the hub assembly at the bottom (usually two or three bolts). Carefully detach the strut from the steering knuckle and pull the complete strut assembly out.
5. **Replace the Shock Mount:** At the top of the strut, remove the old shock mount. Clean the area and install the new shock mount. Ensure it is seated properly.
6. **Reassemble:** Reinstall the strut assembly in reverse order. Make sure to torque all bolts to the manufacturer specifications.
#### 5. **Removing the Rear Shock Mounts**
1. **Access the Trunk:** Open the trunk and remove any trim panels or covers that conceal the rear shock mounts.
2. **Remove the Shock Nut:** Similar to the front, use a socket to remove the nut securing the top of the shock absorber.
3. **Detach the Shock:** Go underneath the vehicle and remove the lower shock mount bolt. Carefully remove the shock from its mount.
4. **Replace the Shock Mount:** remove the old mount, clean the area, and install the new shock mount.
5. **Reattach the Shock:** Reinstall the shock absorber, securing it with the lower bolt and the upper nut. Torque to specifications.
#### 6. **Final Steps**
– **Double Check Everything:** Ensure all bolts and nuts are tightened to the correct torque specifications.
– **Reinstall Wheels:** If you removed the wheels, reinstall them and torque the lug nuts.
– **Lower the Vehicle:** Carefully jack down the vehicle and remove the jack stands.
– **Test Drive:** Take a short test drive to ensure everything is functioning correctly. Listen for any unusual noises and check for stability.
### Conclusion
Replacing the shock mounts on a BMW E39 can improve ride comfort and handling. It’s important to follow the steps carefully and ensure that all components are correctly installed and torqued. If you’re unsure at any step, consult a professional mechanic or refer to a repair manual for your specific vehicle model.
A caliper bolt is a crucial component found in the braking system of a vehicle, specifically associated with disc brakes. Its primary function is to secure the brake caliper, which houses the brake pads and is responsible for applying pressure to the brake rotor when the brakes are engaged. The caliper bolt ensures that the caliper is firmly attached to the steering knuckle or the bracket, allowing for optimal positioning and function during braking.
Typically made from high-strength materials to withstand the forces generated during braking, caliper bolts are designed to resist corrosion and deformation. They are often treated with coatings to enhance their durability. The installation of caliper bolts requires precise torque specifications to ensure they are neither too loose—which could lead to caliper movement and compromised braking performance—nor too tight, which could lead to damage or stress fractures in the components.
In terms of maintenance, caliper bolts should be inspected regularly, especially during brake service or replacement of the brake pads. Over time, they can become worn or stripped due to repeated heating and cooling cycles, vibration, and exposure to road elements. In such cases, replacing caliper bolts is vital to maintaining the integrity and safety of the vehicle’s braking system. Proper attention to caliper bolts contributes significantly to overall vehicle safety and performance.