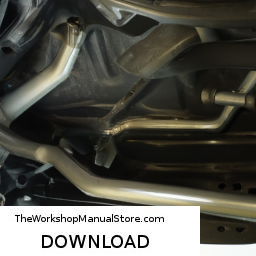
Replacing the input shaft bearing on a Subaru Forester is a task that requires a good understanding of automotive components and some mechanical skill. For comprehensive details, access the manual here…..
- Subaru Clutch Master & Slave Replacement A quick look at how a subaru clutch master & slave work together and to replace them. Live Stream (Monday – Friday 8:30am …
- Here's Why You NEVER MESS WITH A SPRING COMPRESSOR! StrutReplacement #springCompressor #Bilstein4600 Here’s Why You NEVER MESS WITH A SPRING COMPRESSOR! How To …
Below is a detailed guide on how to perform this replacement, including descriptions of key components.
### Tools and Materials Needed:
1. **Tools:**
– Socket set (metric)
– Wrenches (metric)
– Torque wrench
– Screwdrivers (flat and Phillips)
– Pliers
– Pry bar
– Hammer
– Bearing puller/installer
– Seal puller
– Jack and jack stands
– Transmission fluid
– Cleaning rags
– Safety goggles and gloves
2. **Parts:**
– Input shaft bearing (specific to Subaru Forester model)
– Input shaft seal (recommended to replace when the bearing is replaced)
– Gasket or RTV sealant (for reassembly)
– Transmission fluid (if necessary)
### steps for Replacement:
#### 1. Preparation
– **Safety First:** Ensure you are wearing safety goggles and gloves.
– **Vehicle Setup:** Park the vehicle on a level surface, engage the parking brake, and disconnect the battery.
– **Jack Up the Vehicle:** Use a jack to lift the front of the vehicle and secure it with jack stands.
#### 2. Remove the Transmission
– **Drain Transmission Fluid:** Locate the drain plug on the transmission pan (if applicable) and drain the fluid into a suitable container.
– **Remove Drive Shafts:** Depending on the model year, you may need to remove the front drive shafts. This usually involves removing bolts at the differential and the wheel hubs.
– **Disconnect Linkages:** Remove any linkages connected to the transmission (shift cables, speedometer cables, etc.).
– **Unbolt the Transmission:** Remove the bolts connecting the transmission to the engine. You may need to remove the transmission mount and any other components obstructing access.
– **Lower the Transmission:** Use a transmission jack to lower the transmission carefully. Make sure you have enough clearance to maneuver it out of the way.
#### 3. Accessing the Input Shaft Bearing
– **Remove the Transmission Case:** Once the transmission is out, you may need to unbolt the transmission case. Make sure to keep track of all the bolts and their locations.
– **Inspect Internal Components:** Carefully remove any components that obstruct access to the input shaft bearing. This may include the clutch assembly, pressure plate, and flywheel.
#### 4. Removing the Input Shaft Bearing
– **Identify the Bearing:** The input shaft bearing is usually located on the end of the input shaft where it enters the transmission.
– **Remove the Old Bearing:**
– Use a bearing puller to remove the old bearing. Carefully position the puller so that it grips the outer race of the bearing.
– Apply steady pressure to extract the bearing. If it’s stuck, you can tap gently with a hammer to loosen it.
#### 5. Installing the New Input Shaft Bearing
– **Clean the Area:** Clean the bearing seat on the input shaft with a rag and ensure there are no debris or old sealant.
– **Install the New Bearing:**
– Use a bearing installer tool to press the new bearing into place. Make sure it is seated evenly and fully.
– If applicable, refer to the service manual for the correct torque specifications for the bearing.
#### 6. Replace the Input Shaft Seal
– **Remove the Old Seal:** Use a seal puller to extract the old input shaft seal. Be careful not to damage the housing.
– **Install the New Seal:**
– Lubricate the lip of the new seal with transmission fluid.
– Use a seal installer or a flat surface to press the new seal in place, ensuring it is seated flush.
#### 7. Reassemble the Transmission
– **Reinstall Internal Components:** Reassemble any internal components you removed during the disassembly.
– **Reattach the Transmission Case:** Bolt the transmission case back together, ensuring all gaskets are in place or use RTV sealant where necessary.
#### 8. Reinstall the Transmission
– **Position the Transmission:** Carefully raise the transmission back into place using the transmission jack.
– **Reconnect Components:** Reattach all linkages, drive shafts, and any other components you removed. Ensure all bolts are torqued to the manufacturer’s specifications.
#### 9. Final Steps
– **Refill Transmission Fluid:** Fill the transmission with the appropriate type and amount of fluid.
– **Reconnect the Battery:** Reconnect the battery and ensure everything is in order.
– **Lower the Vehicle:** Remove the jack stands and lower the vehicle back to the ground.
#### 10. Test Drive
– **Check for Issues:** Start the vehicle and check for any unusual noises or leaks. Take it for a short test drive to ensure everything is functioning correctly.
### Conclusion
Replacing the input shaft bearing on a Subaru Forester is a detailed process that requires attention to detail and proper tools. Always refer to the vehicle’s service manual for specific torque specifications and procedures related to your particular model year. If you are unsure at any step, it may be beneficial to consult a professional mechanic.
A strut mount is a critical component of a vehicle’s suspension system, primarily found in cars that utilize a strut-type suspension design. It serves as a connection point between the strut assembly and the vehicle’s body, playing a pivotal role in the overall performance, stability, and comfort of the ride. The strut mount is typically located at the top of the strut and is designed to absorb shocks and vibrations from the road, thereby contributing to a smoother driving experience.
Strut mounts are usually made from a combination of rubber and metal, allowing them to provide both strength and flexibility. The rubber portion of the mount acts as a cushion, dampening the impact of road irregularities and minimizing noise transmission into the cabin. Additionally, strut mounts often feature a bearing that allows for smooth rotational movement, particularly during steering maneuvers. This is crucial for maintaining proper alignment and control of the vehicle.
Over time, strut mounts can wear out or become damaged due to constant exposure to road conditions, weather elements, and the stresses of driving. Symptoms of a failing strut mount may include unusual noises from the suspension, poor handling, or uneven tire wear. Regular inspection and timely replacement of worn strut mounts are essential for maintaining optimal vehicle performance and safety. Overall, strut mounts play a vital role in ensuring that the vehicle handles well and provides a comfortable ride for passengers.