Replacing the transmission mount on a Komatsu D20PLL 6 Bulldozer involves several steps that should be performed in reverse order for clarity. Discover more by downloading the manual here……
- komatsu d20pll ????????????? ?.????????.
- Fuel Tank Cap 07050-20900 for Komatsu D31 D20-7 D21-7 D21-8 Subscribe to FridayParts Channel Find more heavy equipment news at: https://blog.fridayparts.com/news/ Learn more at: …
Here’s a step-by-step guide in reverse order:
### Step 10: Reattach the Transmission
– Once the new transmission mount is in place, carefully align the transmission with the mount.
– Secure the transmission back into place using the bolts, ensuring they are tightened to the manufacturer’s specifications.
### Step 9: Reinstall Any Removed Components
– If any components (like the exhaust system, drive shafts, or any other parts) were removed to access the transmission mount, reinstall them now.
– Be sure to reconnect any electrical connectors, hoses, or wiring that may have been disconnected.
### Step 8: lower the Bulldozer
– Safely lower the bulldozer from the jack stands or lift.
– ensure that it is stable and that all safety equipment is removed.
### Step 7: Tighten the Transmission Mount Bolts
– With the bulldozer back on the ground, fully tighten the bolts on the new transmission mount to ensure a secure fit.
### Step 6: Install the New Transmission Mount
– Position the new transmission mount in place.
– Align the holes on the mount with the corresponding holes on the transmission and frame.
– Insert and hand-tighten the bolts to hold the mount securely.
### Step 5: Remove the Old Transmission Mount
– Carefully unbolt the old transmission mount from the transmission and the frame.
– Remove the old mount from its position, taking care not to damage surrounding components.
### Step 4: Support the Transmission
– Use a suitable transmission jack or a block of wood and a hydraulic jack to support the weight of the transmission.
– ensure that the transmission is properly supported to prevent it from falling during the replacement process.
### Step 3: Prepare the Work Area
– ensure the bulldozer is on a flat, stable surface.
– Engage the parking brake and chock the wheels to prevent movement.
– Gather all necessary tools and safety equipment (gloves, goggles, etc.).
### Step 2: Disconnect the Battery
– Disconnect the negative terminal of the battery to prevent any electrical shorts while working on the machine.
### Step 1: Safety First
– Before beginning any work, ensure that you are wearing appropriate personal protective equipment (PPE).
– Make sure you have read the service manual for specific instructions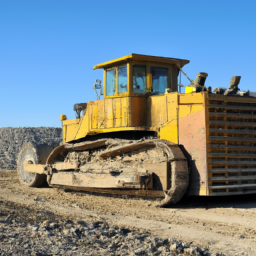 and torque specifications.
By following these steps in reverse order, you can successfully replace the transmission mount on a Komatsu D20PLL 6 Bulldozer. Always refer to the manufacturer’s manual for specific instructions and safety precautions.
Weather stripping is an essential component in automotive design, primarily used to seal the gaps between the car body and moving parts such as doors, windows, and trunks. Made from various materials, including rubber, foam, and plastic, weather stripping serves multiple purposes that enhance both the functionality and comfort of a vehicle.
One of its primary functions is to prevent water, dust, and air from entering the cabin. Effective weather stripping ensures that rain or snow does not seep into the interior, protecting upholstery and electronic components from moisture damage. Additionally, it plays a crucial role in minimizing wind noise, enhancing the driving experience by creating a quieter cabin environment.
Moreover, weather stripping contributes to thermal insulation, helping to regulate the temperature within the vehicle. By reducing drafts and heat loss, it enhances the efficiency of the car’s heating and cooling systems, leading to better fuel economy and comfort for passengers.
Installation of weather stripping is a precise task, as improper sealing can lead to leaks or excessive noise. Over time, weather stripping may wear out due to exposure to UV rays, temperature fluctuations, and general wear and tear. Regular inspection and maintenance are vital to ensure that this component remains effective, improving the overall longevity and performance of the vehicle. In summary, weather stripping is a small yet significant element that plays a critical role in vehicle integrity and passenger comfort.