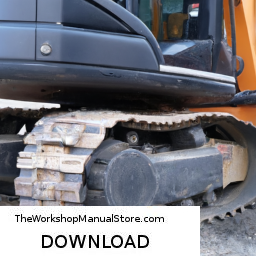
Repairing the planetary gear on a HYUNDAI R170W 7A Wheel Excavator involves several steps that must be performed in reverse order to ensure proper assembly and functionality. Get the complete download manual—click here……
- #shorts Hyundai 170
- Hyundai robex 170w-7 mahena Ang travel at walang lakas baba naten travel motor
Here’s a reverse order breakdown of the process:
### 10. Reassembly
– **Reinstall the Gear Housing**: Carefully place the gear housing back onto the excavator, ensuring that all seals and gaskets are properly positioned.
– **Attach the Final Drive Cover**: Secure the cover using the appropriate bolts and torque specifications.
– **Connect the Hydraulic Lines**: Reattach any hydraulic lines or connections that were removed, checking for tightness and leaks.
### 9. Final Adjustments
– **Check Alignment**: Ensure that the planetary gears are properly aligned and that there is no excessive play.
– **Test Rotation**: Manually rotate the gears to ensure smooth operation without binding.
### 8. Gear Assembly
– **Install Planetary Gears**: Position the planetary gears into their respective slots within the carrier.
– **Insert Sun Gear**: Place the sun gear into the center of the planetary setup.
– **Secure Gears**: Use the retaining clips or bolts to secure the gears in place.
### 7. Bearing Installation
– **Install Bearings**: Place new bearings onto the shafts of the planetary gears and sun gear, ensuring they are well-lubricated.
– **Check Bearing Clearances**: Use a feeler gauge to ensure the proper clearances are maintained between the gears and bearings.
### 6. Disassembly of the Gear Housing
– **Remove Gear Housing**: Carefully detach the gear housing from the excavator, taking care not to damage any surrounding components.
– **Take Out Gears**: Remove the planetary gears and associated components from the housing for inspection and repair.
### 5. Inspection
– **Inspect Gears for Damage**: Thoroughly check the planetary gears, sun gear, and bearings for wear, cracks, or other damage.
– **Check for Metal Shavings**: Look for metal shavings or debris in the assembly to identify potential issues.
### 4. Cleaning
– **Clean Components**: Use a degreaser and brush to clean all components, ensuring that no debris remains that could affect the reassembly.
– **Inspect Seals**: Check all seals and O-rings for wear and replace them as necessary.
### 3. Preparation
– **Gather Tools**: Ensure you have all necessary tools, including wrenches, sockets, torque wrench, and any specialized tools for your particular repair.
– **Obtain Replacement Parts**: Acquire any replacement parts, such as bearings, seals, or gears that may need to be replaced.
### 2. safety Precautions
– **Park on Level Ground**: Ensure the excavator is on level ground and securely positioned.
– **Disconnect Battery**: Disconnect the battery to prevent any accidental starts during the repair.
### 1. Documentation
– **Refer to Service Manual**: Always consult the service manual for specific instructions, torque specifications, and recommended practices for your model.
By following these steps in reverse order, you can ensure a systematic approach to repairing the planetary gear system on a HYUNDAI R170W 7A Wheel Excavator. Always prioritize safety and refer to the manufacturer’s guidelines throughout the process.
The oil dipstick o-ring is a crucial yet often overlooked component in an internal combustion engine’s lubrication system. The primary function of the o-ring is to create a seal between the dipstick tube and the engine block, which prevents oil leaks and maintains the integrity of the engine’s oil system. Typically made from durable rubber or silicone, the o-ring is designed to withstand high temperatures and resist degradation from exposure to engine oil and other chemicals.
When the dipstick is inserted into its tube, the o-ring compresses to form a tight seal. This seal serves multiple purposes: it helps maintain the proper oil level by preventing contamination or loss of oil, and it also keeps dirt and debris from entering the engine, which could lead to premature wear or damage. Additionally, a properly functioning o-ring ensures that the dipstick provides an accurate reading of the oil level, allowing for timely maintenance and oil changes.
Over time, o-rings can wear out, become brittle, or develop cracks, leading to potential oil leaks. This can result in low oil levels and, if left unaddressed, can cause significant engine damage due to inadequate lubrication. Therefore, regular inspection and replacement of the oil dipstick o-ring during routine maintenance is essential for optimal engine performance and longevity.