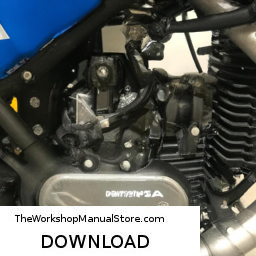
Replacing the transmission pump on a HUSQVARNA 250 450 engine can be a complex task, but with the right tools and a detailed approach, it can be accomplished. Find all the information you need in the download manual……
- KTM/Husqvarna 450, 500 & 501 Engine Rebuild | Part 1: Engine Removal Rebuild the engine on a KTM/Husky 450 and 500 …
- Husqvarna FC250 trouble starting? 1 minute how to diagnose a bad fuel pump!
Below is a step-by-step guide, including a detailed description of the necessary tools.
### Tools Required
– **Socket Set**: A complete socket set with various sizes, particularly metric, to fit the bolts on the engine and transmission pump. A ratchet and extension may also be needed for deeper bolts.
– **Torque Wrench**: Ensures that bolts are tightened to the manufacturer’s specifications, preventing leaks and damage.
– **Screwdrivers**: A set of flathead and Phillips screwdrivers for removing screws and clips.
– **Pliers**: Needle-nose pliers for gripping and removing small clips or connectors.
– **Pry Bar**: Useful for gently prying off components that may be stuck or sealed.
– **Seal Puller**: A specialized tool for removing old seals without damaging surrounding components.
– **Gasket Scraper**: For removing old gaskets and ensuring a clean surface for the new gasket.
– **Clean Rags**: For cleaning surfaces and wiping away any excess oil or debris.
– **Oil Drain Pan**: To catch any fluid that may drip during the removal process.
– **New Transmission Pump**: Ensure the replacement pump is compatible with the HUSQVARNA 250 450 engine model.
– **New Gaskets/Seals**: Necessary for ensuring a proper seal when reassembling the transmission pump.
– **Lubricant/Assembly Grease**: To apply to seals and gaskets, helping to ensure a proper fit and preventing leaks.
### Step-by-Step Replacement Process
– **Preparation**:
– Ensure the engine is off and cool before starting.
– Disconnect the battery to prevent any electrical issues.
– Clean the work area to prevent contaminants from entering the engine.
– **Drain Fluid**:
– Place an oil drain pan under the engine.
– Remove the drain plug and let the transmission fluid completely drain out.
– Replace the drain plug once drained.
– **Remove the Transmission Cover**:
– Use the socket set to remove the bolts securing the transmission cover.
– Carefully lift the cover off, taking care not to damage the gasket.
– **Disconnect the Old Transmission Pump**:
– identify the pump connections (hydraulic lines, electrical connectors, etc.).
– Use pliers to carefully Disconnect any clips or connectors.
– Remove the bolts securing the pump with the socket set.
– Gently pull the pump away from the engine, being cautious of any remaining connections.
– **Inspect Surrounding Components**:
– Check for any damage or wear in the surrounding components.
– Clean the mounting surface of any debris or old gasket material using a gasket scraper.
– **Install the New Transmission Pump**:
– Position the new pump in place, ensuring all alignment pins or guides are correctly seated.
– Secure the pump with bolts, tightening them to the manufacturer’s specified torque using the torque wrench.
– Reconnect any hydraulic lines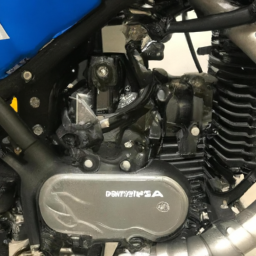 and electrical connectors, ensuring they are secure.
– **Replace Gasket/Seals**:
– Apply new gaskets or seals around the pump and cover areas as necessary.
– Use a small amount of lubricant or assembly grease on the seals to ensure a proper fit.
– **Reattach the Transmission Cover**:
– Place the cover back over the transmission and secure it with bolts.
– Again, use the torque wrench to tighten the bolts to the specified values.
– **Refill Transmission Fluid**:
– Remove the fill cap and pour in the appropriate type and amount of transmission fluid as specified in the owner’s manual.
– **Reconnect Battery**:
– Reconnect the battery terminals ensuring a secure connection.
– **Test the System**:
– Start the engine and let it run for a few minutes.
– Check for leaks around the pump and cover.
– Test the operation of the transmission pump by engaging the drive system.
– **Final Checks**:
– Turn off the engine and recheck fluid levels, topping off as necessary.
– Clean up the work area and properly dispose of any old fluid and components.
### Conclusion
Replacing the transmission pump on a HUSQVARNA 250 450 engine requires careful attention to detail and the right set of tools. Following the steps outlined above will help ensure a successful replacement and maintain the engine’s performance. Always consult the owner’s manual for specific torque specifications and fluid types to ensure proper installation.
A brake rotor screw, also known as a brake rotor retaining screw or brake disc screw, is a crucial component in the automotive braking system that serves the purpose of securing the brake rotor to the wheel hub. The brake rotor, which is the disc that the brake pads clamp against to create friction and slow down or stop the vehicle, must be firmly Attached to the hub to ensure proper operation. The rotor screw is typically a small but robust fastener made of high-strength steel or similar materials designed to withstand the extreme forces and heat generated during braking.
When a driver engages the brakes, the brake pads press against the rotor to create friction, which slows the vehicle down. If the rotor were to become loose or misaligned, it could lead to uneven wear of the pads, reduced braking efficiency, or even catastrophic failure. Therefore, the rotor screw plays a vital role in maintaining the integrity and safety of the braking system. Most vehicles utilize multiple rotor screws, ensuring that the rotor remains securely in place even under the stress of aggressive driving or heavy braking.
Installation and maintenance of brake rotor screws are essential, as they must be torqued to the manufacturer’s specifications to avoid issues such as vibration or rotor warping. In summary, the brake rotor screw is a seemingly minor component that plays a significant role in vehicle safety and performance, underscoring the importance of proper installation and maintenance in the automotive sector.