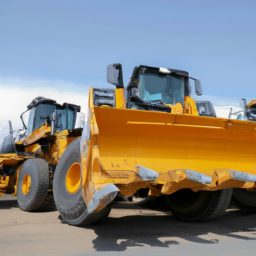
Resurfacing the flywheel on a LIEBHERR L524, L528, L538, or L542 2PLUS1 Wheel Loader requires careful preparation, specialized tools, and adherence to safety protocols. For comprehensive details, access the manual here…..
Below is a step-by-step guide outlining the process, including detailed descriptions of the necessary tools.
### Preparation
– **Safety Gear**: Ensure you have appropriate personal protective equipment (PPE) such as safety glasses, gloves, and steel-toed boots.
– **Manual Reference**: Have the equipment’s service manual on hand for specific torque specifications and procedures.
### tools Required
– **Torque Wrench**: A calibrated tool used to apply a specific torque to fasteners, ensuring proper clamping force.
– **Flywheel Resurfacing Machine**: A specialized machine designed to grind the surface of the flywheel to restore its flatness and smoothness.
– **Dial Indicator**: A precision measuring tool used to measure the runout and ensure the flywheel is correctly aligned.
– **Taps and Dies**: Used for cleaning or repairing threaded holes in the flywheel and engine block.
– **Cleaning Solvent**: A degreaser or solvent to clean the flywheel and engine components before resurfacing.
– **Brake Cleaner**: For removing any oil or grease residues from the flywheel surface.
– **Measuring Caliper**: To check the thickness of the flywheel and ensure it remains within manufacturer specifications after resurfacing.
– **Impact Wrench**: For removing and installing fasteners quickly, especially for larger bolts.
– **Flywheel Puller**: A tool used to safely remove the flywheel from the crankshaft without causing damage.
– **Gasket Scraper**: For cleaning the mating surfaces of the engine and flywheel after disassembly.
– **Shop Vacuum**: To clean up debris and particles created during the resurfacing process.
### Steps for Flywheel Resurfacing
– **Disconnect Battery**: Always disconnect the battery to prevent accidental starts during maintenance.
– **Remove the Drive Train Components**:
– Use the impact wrench to remove the bolts securing the transmission and other components that obstruct access to the flywheel.
– **Remove the Flywheel**:
– Utilize the flywheel puller to carefully detach the flywheel from the crankshaft. Ensure that you follow the manufacturer’s guidelines to avoid damaging the crankshaft or flywheel.
– **Clean the Flywheel**:
– Use a cleaning solvent and brake cleaner to remove oil, grease, and grime from the flywheel surface. This step is crucial for achieving a smooth finish during resurfacing.
– **Inspect the Flywheel**:
– Check for cracks, warping, and excessive wear using the measuring caliper. Ensure that the flywheel thickness is within the manufacturer’s specified limits.
– **Setup the Resurfacing Machine**:
– Adjust the flywheel resurfacing machine according to the manufacturer’s guidelines. Ensure that it is calibrated and set to the appropriate cutting depth.
– **Resurface the Flywheel**:
– Secure the flywheel in the resurfacing machine. Gradually lower the cutting tool to grind the surface evenly. Monitor progress frequently with a dial indicator to check for runout and ensure uniformity.
– **Check the Surface Finish**:
– After resurfacing, inspect the flywheel surface for smoothness and flatness. Use a measuring caliper to verify that the thickness is still within acceptable limits.
– **Clean the Flywheel Again**:
– After resurfacing, clean the flywheel with a solvent to remove any metal shavings or particles created during the process.
– **Reinstall the Flywheel**:
– Position the flywheel back onto the crankshaft, ensuring that it is properly aligned. Use the torque wrench to tighten the fastening bolts to the specified torque settings.
– **Reassemble Drive Train Components**:
– Reinstall any components that were removed during the disassembly process. Ensure all bolts are tightened to the manufacturer’s specifications.
– **Reconnect the Battery**:
– Finally, reconnect the battery and perform a visual inspection to ensure everything is in place.
### Final Checks
– **Test for Vibration**: Start the wheel loader and check for any unusual vibrations or noises that may indicate improper installation or alignment.
– **Monitor Performance**: Observe the loader during operation to ensure that it is functioning correctly without any issues related to the flywheel.
By following these steps and utilizing the appropriate tools, you can effectively resurface the flywheel on a LIEBHERR L524, L528, L538, or L542 2PLUS1 Wheel Loader, ensuring optimal performance and longevity of the machine.
The fan clutch is a crucial component in the cooling system of internal combustion engine vehicles, particularly in those equipped with belt-driven cooling fans. Its primary function is to regulate the operation of the engine cooling fan, ensuring that it engages or disengages based on the engine temperature and cooling needs.
Typically located between the engine’s water pump and the fan, the fan clutch operates on a thermal principle. When the engine is cold, or when the temperature is within an acceptable range, the fan clutch remains disengaged, which allows the fan to spin freely without excessive airflow. This not only reduces drag on the engine, improving fuel efficiency, But also minimizes noise levels. As the engine temperature rises, the fan clutch engages, locking the fan to the engine’s rotation. This increases airflow across the radiator, enhancing the cooling process and preventing overheating.
There are two main types of fan clutches: thermal and viscous. A thermal fan clutch uses a bimetallic spring that reacts to temperature changes, while a viscous fan clutch employs a silicone fluid that thickens with heat, creating resistance and engaging the fan. Over time, fan clutches can wear out or fail, leading to inadequate cooling, which can result in engine overheating. Regular inspection and maintenance of the fan clutch are essential for optimal engine performance and longevity.